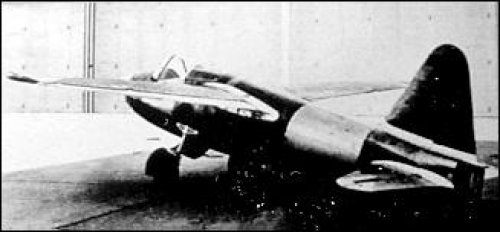
Heinkel HE-178 v1
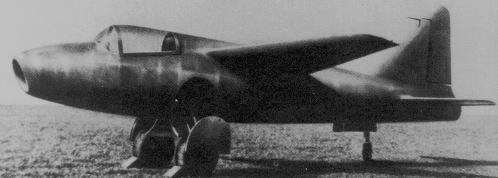
The prototype HE-178 V2 (v1 didn't have
retracts)
The prototype HE-178 V2 (v1 didn't have
retracts)
| Kit | Kit Manufacturer | Scale | Price | Options | Out of Box (OOB) or Modified | Rating (1-10 10=best) |
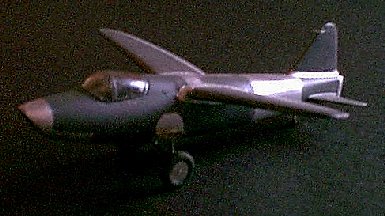
| Heinkel HE-178 v1 | Condor | 1/48 | $10 | 5 |
The Heinkel HE-178 was one of the ugliest aircraft to make history. This squat, grey airplane is notable for only one thing - it was the first aircraft to fly solely by jet power.
The airplane was actually meant to have retractable landing gear, but for the first test flights, the gear was fixed in the "down" position. (There were actually two HE-178s. The HE178v1 had fixed gear, the HE178v2 had retractable gear, but was never flown.) The flight proved the viability of jet power, and the aircraft was moved to the Reichsmuseum where it was destroyed in an Allied bombing raid in 1943.
The kit itself is from a Czech manufacturer, Condor, and is a limited run kit. Opening the kit, you get one sprue of light grey parts, one clear sprue, and some photoetch and a film instrument underlay. No decals are included (though the artwork shows a "Heinkel" on the aircraft under the canopy - which by the photos above is incorrect.) Inspecting the main sprue reveals a few problems:
On my sample, the fuselage halves were warped. Some warm water reshaping, sanding, and diligent use of superglue, model glue, filler and tape helped here. Still, there were bad gaps at the nose and tail.
The biggest area of worry is the cockpit and the bulkheads. The front fuselage and rear cockpit bulkheads need sanding and shaping to fit (and a lot of it.) The rear engine face, also mounted to a bulkhead, fit perfectly (that's one piece....) The cockpit consists of a floor (watch where it's beveled, it angles up from the bottom,) a bucket seat with photoetch belts, two photoetched side consoles, a plastic and photoetch set of rudder pedals, and a plastic, film, and photoetch instrument panel with plastic combing. And none of it - none - has any positive location to it. Trying to put everything "where it fits best" results in a very cramped cockpit with no possible way to move the stick forward and back (if the real aircraft were this bad.) And the wonderfully detailed rudder pedals are hidden from view when everything's assembled.
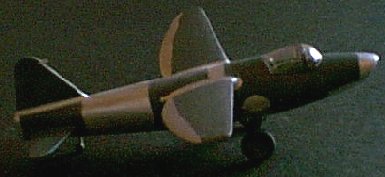
The photoetch appears thick at first, but really isn't that bad - honestly, it's probably the best part of the kit. Most of the photoetch is dedicated to the inside of the cockpit, though what appear to be landing gear doors (see photos above, there are no wheel wells on the kit) are included, as was what appears to be an actuator or counterbalance for the rudder. This requires you to cut a slot in the front of the vertical tail roughly at the hinge line. It should be about 1/4 inch deep.
I drilled out the lightening holes with a new #11 blade after attaching the photoetch to the landing gear. Again - there are no wheel wells, and I didn't find the above photos until after I'd finished the kit - argh! With a little ambition (or a little less sanity) you could cut the landing gear doors out and scratchbuild the wells, which is the main visible difference between the HE-178 v1 and v2.
The interior is called out in RLM-66 as well, but I painted the sidewalls and rear bulkhead in RLM-02, the seat, floor, consoles and control stick in RLM-66. The instrument panel and top of the control stick are flat black.
When done, it's a tiny little kit of an important aircraft. I wouldn't suggest it to a new modeller, though. You should have plenty of patience - as well as putty and sandpaper - before you tackle this kit.
email me!
Another modeller tackled this kit on Hyperscale.
Take a look.