| Kit | Manufacturer | Scale | Options | Modified or OOB | Rating | |
| ME-410 Hornisse | ProModeller | 1/48 | Markings, armament | OOB | 9 |
After the ME-110's dismal showing during the Battle of
Britain, it was taken off of front-line day fighter duties and
work was finished on its would-be successor, the ME-210.
The ME-210, however, had many serious problems of its own -
problems s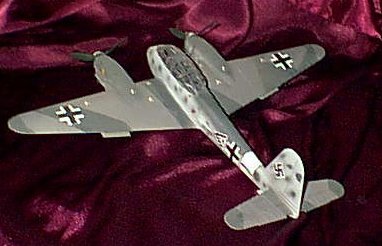 erious enough to force
the resignation of Willy Messerschmidt. One of the most
serious problems was a lack of directional stability - which was
later rectified by lengthening the fuselage. This, and many
other fixes, were incorporated into later models of the ME-210,
and enough changes were made to warrant giving the
"improved" 210 a new model number - the Messerschmidt
ME-410. The 410 was greatly liked by its crews, and used in
fast bomber, bomber destroyer, and reconnosance roles. It
did well in all of the roles, but was not fast enough to always
hold its own against the newer generations of Allied fighters.
erious enough to force
the resignation of Willy Messerschmidt. One of the most
serious problems was a lack of directional stability - which was
later rectified by lengthening the fuselage. This, and many
other fixes, were incorporated into later models of the ME-210,
and enough changes were made to warrant giving the
"improved" 210 a new model number - the Messerschmidt
ME-410. The 410 was greatly liked by its crews, and used in
fast bomber, bomber destroyer, and reconnosance roles. It
did well in all of the roles, but was not fast enough to always
hold its own against the newer generations of Allied fighters.
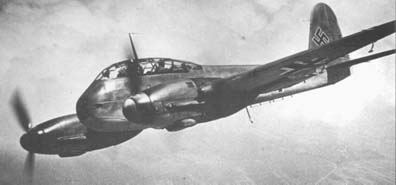
 The ME-410 was a unique, versatile
aircraft. Well armed in its basic form, it also had a
weapons bay underneath the cockpit which could be used to carry
bombs, reconnasiance cameras, more cannons (including a large
caliber cannon, much like a Flak cannon) or even a
"rocket-gun," which rotated through 6 unguided
rockets. The rear barbettes were remotely controlled,
though the control mechanism wasn't completely reliable and
several crews just locked the barbettes in a fixed, rear-firing
position.
The ME-410 was a unique, versatile
aircraft. Well armed in its basic form, it also had a
weapons bay underneath the cockpit which could be used to carry
bombs, reconnasiance cameras, more cannons (including a large
caliber cannon, much like a Flak cannon) or even a
"rocket-gun," which rotated through 6 unguided
rockets. The rear barbettes were remotely controlled,
though the control mechanism wasn't completely reliable and
several crews just locked the barbettes in a fixed, rear-firing
position.
The ProModeller kit of the 410 is up to their current standards - well moulded, flash free, and has decent fit. There are a few points to watch for, however:
The engine nacelles are moulded in a way seeming to give further engine options. The nacelle bottom is moulded into the lower wing, and the top consists of two parts (a left and right half) to be added to it. Take your time fitting and there won't be a seam.
The cockpit, aside from having the "interesting" feature of having all of its framing on the INSIDE, creating a unique painting challenge, is moulded into left/top and right halves along a panel line. If the sighting system for the rear barbettes is out of line, they will not fit together and will leave a gap. Having read about this on rec.models.scale, I delayed putting the sight in for a while, then put it and the canopy together at the same time. This seems to solve the problem handily.
You have the options of three different variants - all with
different armament (and one of which with a different front
windscreen.) One just has the plain armament, one is armed
with GR.41 (I believe) rockets (truthfully more along the lines
of an aerial mortar) and one (which I chose) with an 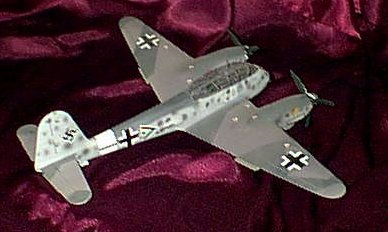 under-fuselage tray which added
two more cannon to the aircraft.)
under-fuselage tray which added
two more cannon to the aircraft.)
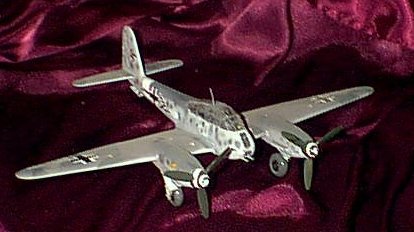
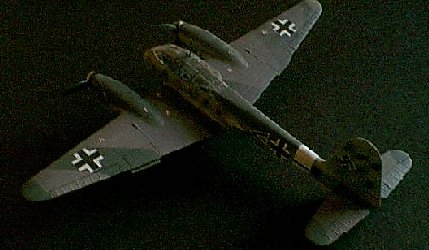
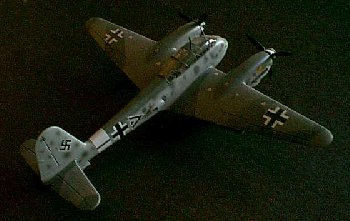
Painting is typical German mid-to late-WWII - hard edged top camoflage on the wings and fuselage top, and a mottle on the sides. When assembling the kit, leave the remote barbettes off and unassembled. Put the fairings on temporarily while painting, then when the paint's dry, take them off, put in the rear machine guns, and glue them back onto the model. This will save some unique masking or repainting problems later.
All in all, this is a relatively easy kit to assemble. Just a little caution in one or two areas will allow you to turn out an excellent model.
11-08-2000 - Post construction notes. I've added antennae to the model, finally. If you're looking for location, look for the "ridge" along the vertical fin. Run a line of wire or stretched sprue from there to the antenna tip (which has a nice "notch" in it for this purpose!) A line also goes diagonally form the same spot on the fin to the fuselage spine. I've aso touched up the mottle somewhat, though I may just strip the kit and redo it. This was an early mottle job, and I've grown less pleased with it as time has worn on. Enjoy the new pictures... They should show the model off a little better.