| Kit | Kit Manufacturer | Scale | Price | Options | Out of Box (OOB) or Modified | Rating (1-10 10=best) |
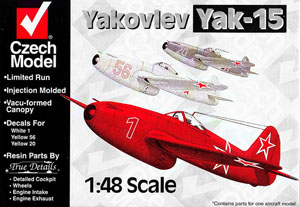
| Yak-15 | Czech Models | 1/48 | $20 | Color/Markings | 8 |
In 1945, while the second World War
was in its final year, the Allies were coming across
examples of advanced German jets. Some allied jets, such
as the Meteor and P-59 had flown. The P-80 was
still a short time away. The Russians, however, had
no jet program in place at that stage of advancement.
Several copies of German jets and engines were sent
back to the Soviet Union. In the interest of expediency,
the Yakovlev bureau decided not to start from scratch,
but to integrate the engine with a proven design, the
Yak-3u (an all metal variant of the successful Yak-3
fighter.) The tail-dragging design led first to the
replacement of the rubber tailwheel with an all steel
unit (due to the hot exhaust gasses,) and then to the
tricycle gear Yak-17.
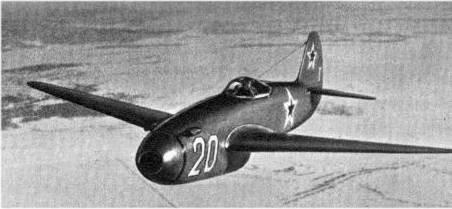
While not a stellar performer, the Yak-15 gave Soviet
fighter pilots and industry a known airframe with a new
powerplant, easing the learning curve for this new
propulsion system.
The Kit
The kit is a limited run, multimedia kit from Czech Models. Upon opening the kit, you'll find several resin trees from True Details, two plastic sprues, and two clear vac-form canopies (yes, they give you a spare.) There's some flash and a little "roughness" to some of the edges of the plastic parts, but this appears to be normal for a limited run kit. One of the common complaints I see going through other limited run reviews is the thickness of the part attachment points - that's not a problem here.
The cockpit is entirely made in resin. I managed to crack the seat pan trying to trim it from the sprue, but careful supergluing hid the seam. The parts are very well made and nicely detailed. If you can't find the control stick, check between two flat, vertical "walls" on one of the sprues.
The parts fit well together, though the diagrams
are a bit vague at points. There is a shield that,
by the instructions, looks like it goes outside the
fuselage. By experience - it doesn't, as I learned
after gluing the fuselage together.
There's also a large plug under the cockpit floor
which will need to be sanded (ground) down - be careful,
resin dust can be harmful. Wear a dust mask.
Paint the engine intake and exhaust (well detailed in resin) before assembly - it's a bit easier that way. I used Rub 'n Buff Silver Leaf - it actually brushes on rather well, if you keep it fresh. I ended up with a very nice metallic finish.
The fuselage halves fit rather well. There are, of course, no locating pins, so constant test fitting is needed. Line the halves up and put in bits of superglue in order to hold everything together while the model glue sets. There was still a bit of filler needed here and there, but not much except on the underside of the fuselage where I had a significant "step" that I could not get rid of.
This was the first time I'd tried using a vac-form canopy (and resin, to be honest.). After quite a bit of careful trimming and sanding, it fit on nicely. It's clear and distortion free, and Czech Models does give you a spare, just in case! It was more rigid than I was expecting, so be careful not to crack it.
The rest of the model went together without a hitch. I used the plastic wheels instead of the resin ones - they were easier to drill a hole in to mount to the landing gear legs.
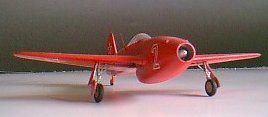
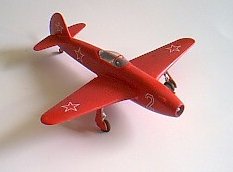
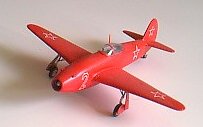
I decided to build the red aircraft from the demonstration team. I used Gunze Sangyo paints - flat white undercoat first, then final "touch up" sanding, and then the red finish.
It's an interesting looking airplane, I'll give it
that. And a nice intro to limited run kits. It's
not as rough of a build as the HE-178 reviewed elsewhere,
and has easily managed resin pieces (and a spare canopy,
which is a nice touch.) Reccommended.