 .
.
 .
.

|
|
|
|
|
|
|
|
|
A-18 Strike Fighter |
|
|
|
|
|
|
The McDonell-Douglas F/A-18 was conceived to supplement and/or replace the F-14 and A-7s of the US Navy. As the F/A designation shows, it has dual roles as both fighter and attack aircraft. The aircraft has gone through quite a bit of development, with the newer F/A-18E/F series being essentially a new aircraft completely. Still, it's probably the most numerous aircraft in Naval and Marine service at the moment, with more examples also being used by Canada, Finland, Spain, Australia, and other nations.
The Kit
This is a very early boxing - the first accurate boxing of a production F/A-18 in 1/48 scale. I built this years ago when it was new, and the only other real competition was from the Testors F-18A/B. This is how the F-18 looked after all the pre-production snags were worked out, and it was placed into service with its first operational (conversion) squadron. (It's also the version shown in Detail and Scale's first volume on the F-18.)
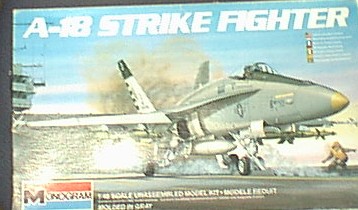
Why the "A-18?" I'm not sure why they left the "F" out of the designation on the boxtop, outside (perhaps) of the fact that it's carrying almost all air-to-ground ordinance except the two sidewinders. It's stayed in this same configuration (no Sparrow or AMRAAMs, just designators in the "cheeks") in every Monogram boxing outside the Blue Angels. If you get one of these (I got mine from eBay,) you'll find nice molding with a few large ejection "pads." You'll probably want to trim the ones in the wings down - this is a sore spot with every boxing, but not a major issue.
There are (counting this) three versions of the F-18 boxed by Monogram:
The other plus to this kit is, as someone else mentioned, the box art - to paraphrase, "You can almost FEEL the flight deck shaking as it spools up, ready for launch." This is one that's worth framing. Aside from that, the fit is - well, reasonable. The same weaknesses that are in ALL the Monogram kits show their roots here - weak wing fits, the "groove" along the underside of the LEX (which you can fill, shim, or glue creatively) and all. Still, these were made when the molds were new - and in just a test fit (which turned into a glue session) of the ordinance, everything went well. Just take your time along the fuselage and the underside joins for the wings, and you should be able to get by with a minimum of putty.
More as this gets built.
I'll say straight out - my assembly of this kit is all over the map. I'm not following directions - this is some test fitting leading to gluing, a lack of prepainting, the works. But it lets me bring out a few points.
For starters, I have to find out if there's an earlier (still) version of the kit, with prototype features such as the "dogtooth" wing and stabilizer, and unfilled LEX slots. I mention this because at the time this kit came out, the F-18 was just being introduced... and the plastic gives a part number (5802-0601 for the upper fuselage, 5802-0611 for the lower) designated for white plastic. I'm intriegued....(Side note, after asking on the rec.models.scale newsgroup, I was told that, yes, it did come out with prototype markings.... I must find one.)
I decided early on that, yes, I was going to use the kit markings, just as I did in the early-mid 80s when I first built this. This means being aware that the Sidewinders are *white,* not grey like they are today (borne out by the pictures in Detail and Scale on the F-18, first volume.) It'll make it stand out a little visually.
 I'd also forgotten about some of the irritating
placements of ejector pads - Most, you can get to easily, but some (such
as on the aforementioned Sidewinder missiles) are very irritating -
between a section "band" and the forward fins, an don the "bump" that
one of the *rear* fins goes over - yes, sand it down, or they wont' fit
properly! Argh... At least the (laser guided) bombs are easy to deal
with, and just need a little sanding to get rid of seams.
Finally (so far) I've found a good (to me) way of dealing with the
vertical fins. You can fight with them and get gaps everywhere, or have
them align strangely by putting them on *late* in assembly, the way R/M
tells you to - or put them on before you join the fuselage halves, and
glue the downward-jutting tab to the fuselage side. It's a much cleaner  join
(though there's still a small gap where I jiggled a fin on the *inside*
side of the fin... oops.) Still, it's easier to clean up this way.
One other thing I'd forgotten to note. On this kit, and the later
F-18A (such as the Blue Angels release) there is a mold line on the
lower fuselage that runs at an angle on both sides. It appears to be a
correction to the molds, probably to fix shape issues. The problem with
this mold line is that not only is it very prominent, but there
is no detail at all above the line. Looking at the Detail and Scale
volume on this aircraft, it doesn't look like there's much detail to
add above this line anyway,
but you should be aware of it. There may be some scribing work ahead.
(I can't call it "rescribing" because... well, there's nothing there.)
Well, the airbrush was broken out and some prepainting done on the cockpit. I wanted to try to get some decent detail in there, but I also wanted to get it right. Looking in my "Detail and Scale" (finally got a replacement for the initial variants off of eBay - it's one of the books that disappeared during a move) I got a good idea of the side consoles and instrument panel... but noticed that, despite Monogram's "Dark grey" and Modeling Madness's Dark Gull Grey callout for the interior... I was seeing a LOT of black. Everywhere. As it turns out, the area under the rear 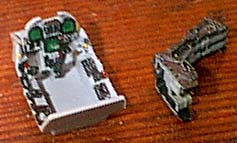 canopy is black (with some details thrown in, like red placards, silver tubing, etc.) As is the area under THAT, though the equipment bay beneath is grey. The cockpit tub is grey, but the cockpit sills are black. So's the ejection seat! Which, thinking of it, makes sense... but that turned into my third layer of paint... (Dark Ghost grey, Dark Gull Grey, then Black. Oy.) Didn't lose much (or any) detail, though.
The cockpit tub was painted grey, then the varied panels were painted black. I scraped off the top layer so the switches would be visible (who needs to drybrush? :) ) then looking at the photos, picked out some of the red and yellow switches.
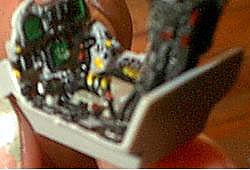 The ejection seat was painted black, but the cushions and harnesses seem to be a range of colors. I used RLM 02 from Gunze Sangyo ( a greenish-grey) for the seat back and bottom, and another grey for the straps. (These could also be brownish or an olive color.) A picture of the seat on Aircraft Resource Center had a grey pack up top, and the belts (which R/M wants you to loop around and reattach to the seat) hanging down. I did these with strips of masking tape. I also just "let 'em hang."
After this, the instructions would have you install the inner portion of the engine rear, then the horizontal stabilizer. Well, I didn't - The engine "insides" needed painting and (with a test fit) fit in just fine afterward. The tailplane is a constant weak point on this kit - the bar that connects the two halves is plastic, thin, and breaks easily. Plus they get in the way of seam work. Fortunately, the previous owner of this kit had (either accidentally or intentionally) cut the center bar from the tailplane. It'll be replaced with rod (plastic or metal, not sure yet) after the kit is painted.
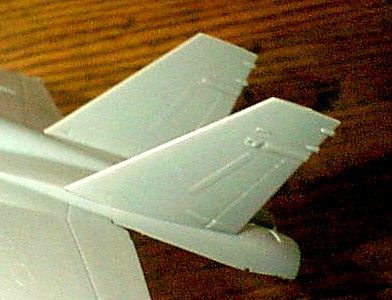
Remember my suggestion on how to fit the vertical tails? Scratch that... I'd forgotten the rear fuselage seam. This can be fixed and held together with tape... if the tail's not in the way! The front needs some work too - that angled mold line gets scraped off, yes, but there's still going to be some filler needed here. Don't forget to open up the holes in the wing if you want to fit ordinance. (I'm planning to use two of the LGBs that come with the kit, and salvage two multiple eject racks and four "dumb" bombs from the Blue Angels kit - which is not the same "A" model as this, seems to be a later revision, including the ECM "bumps" behind the cockpit....)
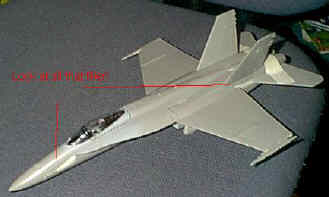
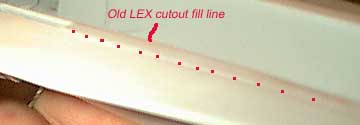 Speaking of revisions, I ran across something interesting. I've highlighted it in this section's picture. I mentioned getting confirmation that this kit was issued in white plastic as a prototype aircraft. I caught something just before gluing the fuselage together - follow the red dots. You can see where what once would have been a much LONGER, open slot for the leading edge extensions has been filled in. This was done just like on the prototypes - they actually *filled* it. I don't see evidence of this on the upper fuselage, leading me to believe they retooled it for an early production Hornet. But now I've *got* to find the white plastic version of this kit to make a prototype!
Lastly, I fit the nose on. This is just butt-joined to the fuselage, so watch your alignment. Gaps, fortunately, seem easy to spot.
On we go... With the fuselage together, it's time for a LOT of putty. I have a lousy time with putty, to be honest.... and this one needs a lot of it. Be prepared to lose detail around the nose and rear fuselage. The nose is the worst.
Things got strange around this point - probably with the "It looks almost done..." syndrome. I prepainted the landing gear wells and inside the landing gear doors, not to mention the gear itself. I kind of hopped around and didn't honestly get much of anything done! The front canopy was glued on - and a day later, I found some glue had worked itself up where I didn't want it, and marred the front canopy. Arrgh... Not badly, but enough that I"ll notice and be annoyed. It seems to have worked itself a little off center, too.
 I also worked on the fuselage underside - The air intakes were painted (white inside, black "wall" at the back) and fitted on. Watch how you trim these - they still don't seem "right" to me somehow. Any external "bumps" from the ramp or the attachment of the intakes will affect how it looks and fits. You've been warned. The side "pylons" with targeting pods were also assembled - the fit here was bad, with plenty of gaps. Break out the putty, and remember these'll be WHITE. Oh, joy.
While these set up, I installed the engine exhausts. These also didn't fit properly - unless there's "supposed' to be a step there. I don't recall seeing it - but it exists on the kit. There were no gaps in this area, at least not that badly. So, I did my best to center the engines. It looks uniform, and it's not overly noticable.
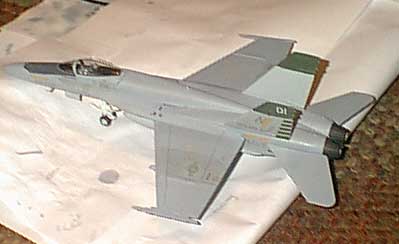 At this point, things just seemed to really start falling together. I added the tail (somewhat) - one side butt joined perfectly, the other wouldn't stay put until I drilled part of it out and put in some plastic - from, of all places, its "connecting bar," trimmed slightly to fit. Some superglue and model glue combined held it in place (after a few tries.) I started painting the armament, as well, and getting other painting tasks out of the way (tires, wheels, that sort of thing.) I then decided, the heck with it, I like the way the aircraft looks "buttoned up" (canopy closed.) I trimmed the two "supports" (whatever they are) so the frame would fit - and found out the frame was warped!
Everything else was ready... Attached the pitots, and the talihook - then realized I had to fix the tailhook, unless the plane was landing upside down. This is a problem with Monogram's mold... I have NO idea what they were thinking when the hook faces UP between the engines!
I just wasn't catching a break. Glue and tape to the rescue, again - with that out of the way, the clear canopy fit on (nice and snug.) With everything together, it was off to the paint shop.
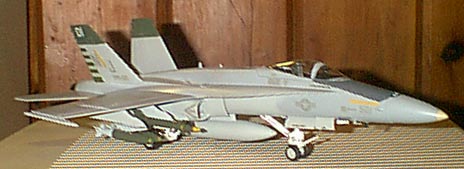
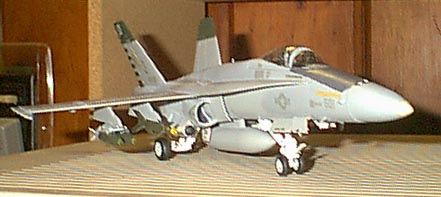
I almost had to delay things here - I could've sworn I was out of the dark gull grey. And propellant. And just about everything else! Digging around brought up my handy dandy PollyScale colors, though, so in to paint I went. (I have to say, I really love Pollyscale's paints...) The lighter grey went on first, then the dark. No masking was done - just careful spraying around the vertical tails (which stay the lighter grey.) I followed the kit layout for the anti glare panel - which looks different from the box art, but oh well. The next challenge was finding something to match the green on the decals - I got a close match with one of my RLM colors (82, I think) but it still isn't quite "there." As I vaguely recall from when I first built this kit (when it was NEW - don't laugh) the "Beret Green" (something like that) in the little Testor bottles matched perfectly... but it was enamel, and the store didn't have any. Oh well...
I masked the vertical tails for this with frosted "clear" tape... of course, on one, it didn't burnish down as I thought it had, so I had a green outline on the detials. Rrrgh... Did I mention I wasn't getting a break on this? Some touchup, and we were good to go.
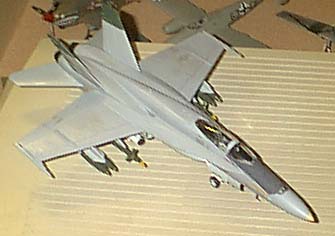 Once that had set, I Future'd the areas decals would go on. I just applied with a brush... no fuss, no muss. But these decals... They look as though they've been water damaged a little, so I was somewhat worried. But, they came off nicely - and stick with a vengeance! It took a lot of coaxing to get some of them in place. I trimmed the green stripes from the rudder decals and applied them seperately from the N/J tailcodes (and formation light.) Works nicely, and it makes one, large, awkward decal into two easy-to-handle ones. The glossy surface made decal set almost unneccessary (except to fit over the "lumps" on the tail.) This was a three stage process, giving decals time to dry - By the way, if you're going to use the outer pylons, remember to wait 'til AFTER the underside insignia is on before putting them on! (Guess who didn't and had to do some creative cutting... *cough*)
That finished, I gave the model an overall Future coat, and later a semi-gloss (or semi-matte, hard to tell) coat of Future + Gunze Sangyo Flat Base. I think I'll want it flatter, but the flat could be put on with a brush....
Last but not least, I built the multi-ejection racks for the outer pylons (scavenged from an F/A-18C kit,) and armed the plane - two LGBs, four 1000 lb (?) bombs. The Sidewinders haven't been painted yet (out of white, and I'm leaving this as an early F/A-18, pre-Grey sidewinders.) Yet... it was finally...
