F/A-18A/B Hornet

|
|
|
|
|
|
|
|
|
F-18 Hornet |
|
|
|
|
|
|
History:
The F-18 Hornet was developed initially by Northrop aircraft in a competition with General Dynamics to produce a lightweight fighter for the US Air Force. THis competition led to the F-16 Fighting Falcon being chosen to complement the Air Force's heavyweight F-15 Eagle air superiority fighter. Northrop's entry, the YF-17 Cobra, was developed further and turned into the F-18 after input from the US Navy. It was due to complement the F-14 Tomcat swing wing fighter, as well as take over strike and attack duties from aircraft such as the A-7 Corsair. It has been adopted by many other countries such as Canada, Australia, and Spain, and has since been developed ifrom the A/B models to the C/D, and the much larger (and mostly new) F/A-18 E/F Super Hornet. Early models still serve with the US Navy and Marine Corps in the NSAWC (Naval Strike and AIr Warface Center,) along with F-5 Tiger II and F-14s as "adversary" aircraft to train our fighter and attack pilots in the tactics of possible hostile nations.
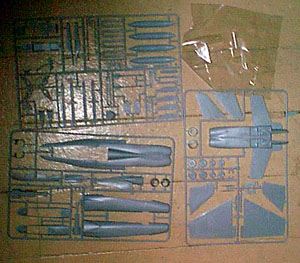
The Kit
There are many kits of the F-18 Hornet family out there, by Testors, Revell-Monogram, and Hasegawa. Testors kit is one of the first I'd built, many years ago (when the F-18A/B was new.) It is still the only one I know of that gives you the option of building a single seat A or dual-seat B straight out of the box. It does this through use of an insert - a good way to keep the molds (and thus the kit) cheap. In this kit, it worked out rather well (as I recall.) We'll see how the fit from the molds has held up over time. I do recall that this kit taught me about making sure you have the right colors - years ago, the grey I used for the topside matched the decals perfectly, and you couldn't see them when they were put on!
 The kit depicts an early F-18A/B. The leading edge slots have been filled in as they're supposed to be, but many of the ECM "lumps and bumps" are missing that were retrofitted to the A/B series. If you want to use this kit to make a "Top Gun" (NSAWC) aircraft, some of these will have to be added. (This is not, however, a difficult prospect, needing only some putty and/or sprue molded to shape.) It's a tossup as to if it's easier to add these to this kit ore remove them from the Revell/Monogram F-19C. This kit is the only game in town if you want to make a two-seat "B" model, though. (Note - no, actually Hasegawa does one, but it's four times more expensive.)
The kit does not include (or show) the side mounted ID spotlight fitted to Canadian aircraft. If the aircraft you're modelling has this, you'll have to scratchbuild it. The instrucitons also show (in the painting guide) AIM-7 Sparrow missiles on the fuselage stations, but note that they're not included in the kit. (I for one am somewhat tired of having targeting pods here on all my F-19s.) You'll have to scrounge them from another kit or buy an aftemarket weapons set if you want them (or AIM-120s) as well as putty the sides to take out the recesses to fit the pods in. The kit DOES include drop tanks, targeting pods, "dumb" bombs, AIM-9 Sidewinder short range missiles, and (suprisingly!) HARM anti-radiation missiles. I'm not sure an A/B can carry those, but if you want to make a SEAD/ "Wild weasel" aircraft, you can use them.
The moldings have held up well, the kit showing little flash. Panel lines are engraved nicely. The cockpit area is passable, if not exceptional, and if you want to go to town on it you'll have to find an aftermarket set such as the ones from Black Box - though given how the cockpit and rear fairing fits, I'm not sure how this would work. Also, a nitpick - split wheels. These are always (to me) a pain, and will probably be replaced with resin if I can find some that aren't "out of air."
The instructions are somewhat comprehensive - unlike SOME Testors kits (not to mention ProModeller) there are no photos, but they will get you through the kit with color callouts throughout. My example even had a center insert with other languages.
This kit is a mix of good and... well, not bad, but you can tell the kit's been around (even from the instructions, stating the Marine corps will use the RF-18 "starting in the 1990s.") But it's not bad, and assembly shouldn't be all that difficult. The price is right, too.
We'll see how it goes as this gets built.
The Build!
12/17/2011. Yeah. it's been a long time. This isn't even the same physical kit as I photographed way back when - but the kit itself is the same.
The plastic, I believe, is actually harder now than it used to be. I don't know if it's Testors (as I've run across very soft plastic sometimes - too much the other way!) or just this kit having been around, but it's not *exactly* pleasant to work with.
I decided, after looking at the cockpit area and a few test fits (also not pleasant) to make this a "ceiling project." Yep. Made just to hang from the ceiling and look decent. So, I didn't start with the cockpit - I tossed everything but the tub, which was glued to the wheel well and glued into the cockpit.
The canopy was taken outside and painted silver inside. The fit of the canopy to the canopy rail is... not great. It took a few tries to get it passable (and on the far side, well... yeah.) Still, it sped things up. The nose section was fit together - it didn't take much putty, but did take a fair bit of sanding. While that was drying, the fuselage was put together - yeah, this kit can fly together if you aren't detailing! However, the lower area of the LEX requires you to put in panels to close it up. Why, I'm not sure - I think they come out too thick, actually. Then again, this is an early kit.
The lower rear fuselage and top just did not want to cooperate when time came to mate them. The rear wasn't bad, though it required some sanding later. The front... oy. The plastic seemed to ignore the glue. Eventually, it did - somewhat - get together, though it takes some sanding to reduce some of the "overlaying" of parts and get things to stay glued.
The intakes weren't too bad - don't forget to paint inside (unless, of course, you're doing like I did,) and while you're at it, do something about that back wall - like paint it black. Otherwise you stare into flat grey plastic.
Having gotten front and rear (and canopy!) individually assembled, it was time to bring them together. There's a fair gap where the two halves meet. Prepare to putty - but they line up fairly well. I glued the front "hook" of the LEX into to the indentation in the front fuselage. One side (again, that far side, not seen in the finished pic for a reason!) just wouldn't join up well - so it became the object of much puttying. A small line of cement was run across the bottom of the left (near) LEX when finished to secure it.
The nose actually fit on fairly well. No putty needed. Same with the wings - I find the details of the wings... unusual, but it works. Glue the top wing onto the stubs, then there's a rectangular piece on the trailing end of the wings - mine needed some sanding to lay flat - to put in. Again, not sure why this design, but what's done is done. Add the actuators (pay attention! Three sets!) to the undersurface. Hold off on stores. Add tail surfaces... and you've got a hornet.
OK, there's also the side fairings. One of mine has decided (again... that far side!) to go on vacation somewhere. It was there when I glued it on... The near side has decent fit at the back, and questionable in the front. Honestly, I wish they'd give the option to dump these and just put AIM-7s on (given the kit vintage.)
We've also got landing gear doors to fit on. The fit on these... wasn't the greatest. Some putty in the back to fill in holes. The nose... clip and fit some sprue in there for support. It's almost a guarantee that the doors will try to fall into the wells otherwise if you're buttoning it up. Go ahead and separate the doors, too - keep the two front ones together as a unit, separate from the middle, and remove the rear door. This will let you sand for fine adjustment - and it is needed. But they fit on fairly well.
Painting
This was brush painted. Light ghost grey and medium grey - several thin coats. The light grey was used overall to check on seams and such, as well. Once finished, the medium grey was edged around where needed, but this is generally a fairly simple scheme. Take your time.Decals
Kit decals were used, for 410 sq, North Bay, Canada.
For the most part, the decals went on quite nicely. The formation lights decided they'd be a pain - they'd wrap around, grip far too early and not want to be moved, come off hours later - but only these, and I'm not sure why. Again, at "ceiling scale," most stenciling and the like was left off.
Finishing
This was now a very grey model... a bit too much, in fact. All detail was hidden. So, I took a pencil (yes, very high tech!) and outlined major areas - flaps, ailerons, rudders, etc. with a panel line here and there, as well as "coloring" vents. Mistakes were erased (reason to use pencil!) and it was toned down by the simple expedient of rubbing in the direction of airflow.Partly out of wanting to even out the finish, and partly out of irritation with the formation light decals deciding to hop off *again* (this a few days later,) I brushed on some pollyscale clear satin. This sealed everything in, and had the side effect of streaking the pencil a bit more, giving the working military aircraft's "grubby" look. Not sure why it decided to clean the Canadian roundel on one wing... but who can say how these things wear from one time to another!
I finished with mixing some aluminum, black and grey for a "burnt metal" finish to paint the engine nozzles, and finally attached the underwing tanks. Then, loops of fishing line on a line stretched across the corner, and viola!
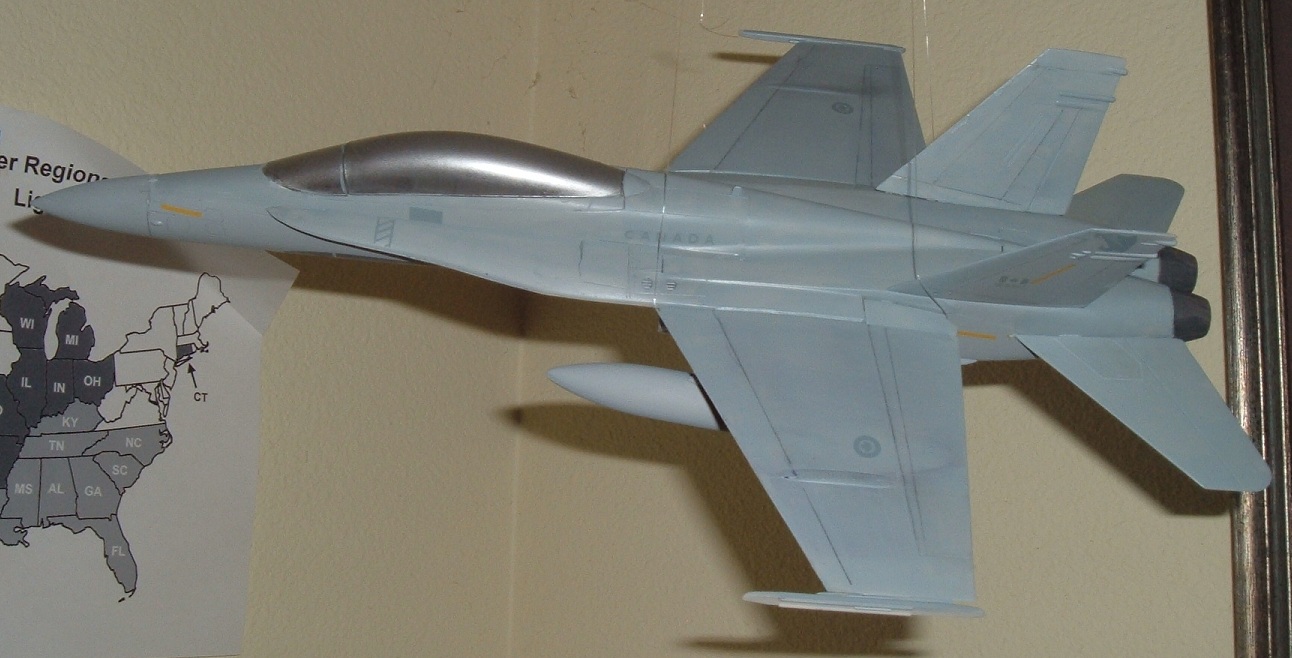
It's not honestly finished, - I have no radome tan for the cap, and there's no searchlight on the side as there are for actual Canadian F-18s, plus the sidewinders for the wingtip rails aren't painted or attached. Some of the edges are a bit rough, as well, I admit. But for what it's going to do - hang in a corner where nobody's getting a close look - it'll do.