 .
.
.
|
|
|
|
|
|
|
|
|
Beech Bonanza |
|
|
|
|
|
|
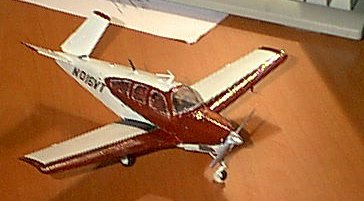
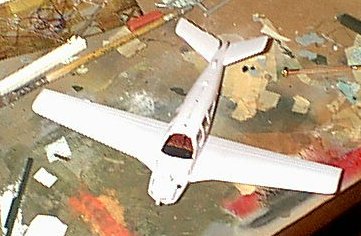
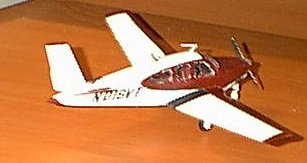
The Beech V.35 Bonanza, successor to the legendary Staggerwing, is one of the most unique private aircraft around. The V-tail fitted to so many of them is its most noticable feature, giving it a distinct look and lower drag than other private aircraft of the same size. With good range and the ability to haul four or six passengers, t's been a good seller for Beech for many years.
There are some aircraft that just "get" you - the ME-262, FW-190, and razorback P-47 are some of mine. The V-tailed Bonanza is another. There's just something about this aircraft that just looks "right." And while P-47s and FW-190s are easy to find kits of, Bonanzas aren't. So obviously I was thrilled to find this kit.
 On first opening the box, you're confronted with a few sprues of white plastic parts (and a few clear.) The plastic seems a bit harder than usual. This kit would be right at home in any limited run manufacturer's line - there's a bit of flash, no locating pins or other aids on major parts, and several sinkholes and ejector pin holes. This is not a kit that's just going to fall together. Still, I wanted one, so I started in.
Starting with the cockpit... There's less here than the usual kit. Kit seats are somewhat basic, and need a good bit of cleanup around the edges. They also need lap belts, at least! You can go with the suggested "red" color, or - well, it's a private plane, paint it the way that you like! The double rear seat doesn't have any sort of positive location to it... a theme that's repeated throughout the kit. Still, it's easy enough to locate and get straight.
Test fitting the parts at this point makes the kit seem like it will be difficult to put together straight. It's not. The seats fit onto the wing bottom, which serves to connect and align the fuselage halves if you put them together carefully. The cabin windows also go on here - and don't neccessarily fit all that well (specifically the left front with the small corner frame.) You have to put the rear windows in, at the least - the others could possibly fit in afterward if done carefully, but I wasn't ready to push my luck! I let the windows dry, and assembled the front console. Superglue helps here - the classic "throwover" control yoke is a bit delicate, and the console, rudder pedal assembly and firewall all work with each other to keep aligned - again, with no assistance from any pins or other aids. 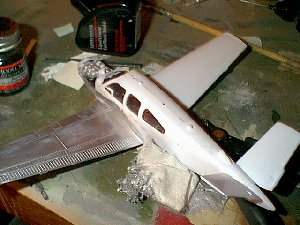 Let everything dry before putting the fuselage halves together. The wing takes some alignment work, and there's no definate location for the firewall. The best bet is to fit it in loosely while putting the fuselage and wing together, then glue it into final position as the last part of step 2. On my kit, the fuselage at the bottom of the windscreen was warped, so some putty was needed.
The wings fit on nicely, with no gaps on top. The engien also went together easily - but I ended up gluing the cowl on, as large gaps appeared between it and the fuselage. It also helped align the fuselage with the previous problem between it and the windscreen. If ou do this, you may be able to add noseweight - this plane has a very "heavy" tail. A resin or white metal engine may help to add weight to keep it sitting properly as well. Watch the exhaust pipes as you fit them through the fuselage.
Fit the landing gear and misc. covers on - I left the doors off until after painting. I also left the landing gear white instead of silver (except for the oleos). Part 28 isn't a large antenna, it's actually a stand for the aircraft (remember, it's very tail heavy.) I didnt' fit most of the antenna and such (besides part 31, which needed filler in its "trench") until after I was finished - which was after the photos were taken.
 The final step was fitting the windscreen, front cowl, and propeller on. I left the propeller off until after painting. THe front cowl, upper cowl, and windscreen were all glued on (again, to fix alignment and gaps.)
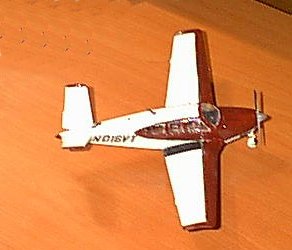
Painting I hate painting gloss white. I really do. Initially, I was going to use Rub 'n Buff and give this an overall metal appearance, but that didn't quite pan out.I couldn't get rid of some of the harsher scratches from sanding the putty needed to build this, and they showed through badly. So, Iused liquid mask on the windows (not taking my own advice and "outlining" them with thin strips of tape - more later,) coated that with a layer of white primer, then of gloss white paint. I sanded to get rid of orange peel, and added another layer. With more orange peel... After more sanding, I got rid of a majority of it. I then proceeded to hand-paint the red-brown areas to give it some character., and edged them partially with dark green. (Not all that visible.) I used Rub 'n Buff for the metal propeller, and painted the back flat black.
Then came the frustrating part... I went to take off the liquid mask. Not all of it came off... some flat out refused. It was worst around the edges, and in the little "corner window" on the front left side. If I'd masked with tape around the edges, then "filled in," this would not have been a problem! Ah well... live and learn. At the end of all this, once everything had dried (though I'm still working on getting white paint flecks off the windows! I added the mis. small antennas and the boarding step.
Decals - Academy gives you just one sheet, common to all their 1/48 civil lightplanes (Cessna and Beech) with a few small badges for the specific plane, and black and white numbers - which just look too large on this aircraft. I'd suggest finding slightly smaller dry transfers of the color you want. I chose to use the decals (which went on fine) and gave my aircraft "N016VT" - I don't know if that's a real aircraft or not, honestly, but it works for me for personal reasons...
All in all, it's a simple kit, but it has some fit problems you need to be aware of. With a little preplanning, you can get a decent model out of it. Oh, and use tape if you mask with liquid masking fluid!