Macci c.205 Veltro
Kit |
Kit Manufacturer |
Scale |
Price |
Options |
Out of Box (OOB) or Modified |
Rating (1-10 10=best) |
| Macci c.205 Veltro | Hasegawa |
1:48 |
$23 |
Markings |
8 |
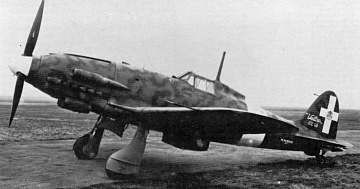
The Macci c.205 Veltro was developed from its predecessor, the c.202 - which itself was derived from the radial engined c.200. All the fighters in this line shared the unique design characteristic of uneven length wings - one wing was longer than the other in order to offset torque. It was an elegant looking design, but lightly armed.
The kit itself is typical Hasegawa - light grey, finely molded plastic, lightly defined panels, nine step instruction sheet with Gunze Sangyo colors called out. It does give the names, so you can find the appropriate colors in your favourite paint brand.
 The cockpit fell together typically easy. The
painting instructions were simplified, so check your
references for handle and switch colors. The interior
"Verde anticorrosione" color is matched well by
British Interior Green. Just watch the fit of the side
panel (which you attach to the sidewall) - it can press
against the seat and throw off the side alignment. Fit it
into the fuselage halves when done, and you shouldn't
have any problems.
The cockpit fell together typically easy. The
painting instructions were simplified, so check your
references for handle and switch colors. The interior
"Verde anticorrosione" color is matched well by
British Interior Green. Just watch the fit of the side
panel (which you attach to the sidewall) - it can press
against the seat and throw off the side alignment. Fit it
into the fuselage halves when done, and you shouldn't
have any problems.
The fuselage and wings are identical between the c.202 and c.205 kit. The top deck and bottom of the nose are provided as seperate pieces for each kit (the .202 and .205 have different oil cooler intakes.) The top deck doesn't fit quite as well, but a little putty and / or sanding should take care of it. The wings show the usual Hasegawa problems for a kit a few years old - there's a small (but noticable) gap between the wings and fuselage - maybe 1/32 of an inch - and the profiles don't quite match. The bottom of the wing doesn't meet the fuselage at the rear, leaving a small step to take care of. Nothing major to worry about. The air intake/dust filter has a seperate sidewall in front. Careful alignment should take care of any possible gaps.
The landing gear bay in the wing is detailed nicely with four parts - the top, front, and back walls, and some framing. The front wall shows some moulded in engine detail - you may want to paint this area before assembly to bring out that detail. The landing gear itself is made of several bits - it looks complicated, but fits well.
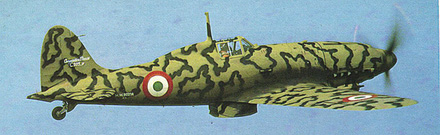
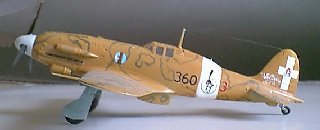
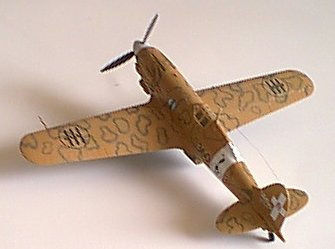
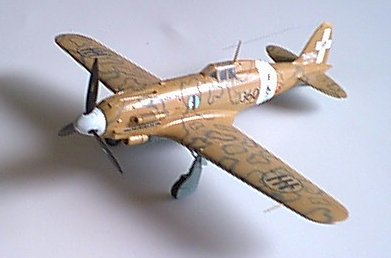
I prepainted the white band around the fuselage, as the decals were reported to be somewhat translucent. After masking that off, I sprayed the grey and base tan coats for the fuselage. I was going to do the camoflage scheme using my airbrush, but - since for now I'm stuck using propellant cans, and wasn't getting constant pressure - I gave up on that and carefully hand-painted the camo with a fine brush. I think it turned out rather well.
The white decals were, as feared, translucent. I would have masked off the white cross on the tail, but I couldn't get the dimensions quite right, so I left it as is. All the decals fit down quite nicely, and reacted very well to Microscale's Microsol (important with the white fuselage band) - bringing out the underlying detail. (Just be sure to apply it and leave it alone.) I used the "freaked cat" (my wife's term for the unit markings, I can't think of the markings themselves right offhand) decals. There aren't many, and they were easy to work with.
Also a side note - comparing it and the KI-61 Hein, which also used the same Daimler-Benz engine from Germany (the powerplant that powered the ME-109) I can see why Allied pilots in the Pacific could confuse these two aircraft. The shape is very similar.