Northrop XB-35 Flying Wing
|
| ||||||
The XB-35 was one of the ultimate expressions of J. Northrop's desire to build the cleanest aircraft he could - namely, the flying wing. Others, such as the Horton brothers and (later) the Arado firm in Germany, had looked into the same idea for much the same reason. Several prototypes had been created before - one or two man flying wings such as the N9M series and the (cancelled) Black Bullet fighter.
Eventually, the call was put out for a bomber with the range to hit Europe from bases in the US, to provide a fallback force in case of Britain's fall. Two designs made it to the testing stage - the XB-35/YB-35, and B-36 Peacemaker. Despite its greater speed, the B-35 prototypes suffered from lack of range and a problem with yaw stability - not something desirable in a level bomber. It also suffered in timing - as it was coming into testing, the jet age was dawning. Even fitting jet engines to the YB-35 (resulting in the YB-49) couldn't save the flying wing, as the early jet engines drank far too much fuel. It, and the RB-49 recon aircraft, were apparently the last gasp for the flying wing until recently, when the B-2 bomber appeared and vindicated Northrop's vision.
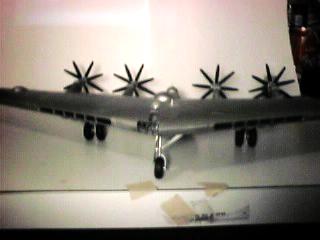
The XB-35 (experimental) and YB-35 (preproduction) versions had a number of differences between them. The most noticable was that the counterrotating props of the XB-35 were deleted, primarily due to driveshaft and vibration problems, in favor of regular 4-bladed propellers.
Something this size has to be built in 1/72 scale!
The kit itself goes together rather easily, and gives you a nice choice between
the XB and YB versions of the Flying Wing.
(There's also a kit of the later YB-49 jet bomber.)
There are only a few points to watch on the kit.
The metal finish was done with Testors Metalizer (Steel, non buffing) sprayed on
with a basic, single action Testors/Aztech airbrush. Both nice products, but be sure to seal your metalizer, and have at least two bottles on hand - this guy takes a LOT.

FOLLOWUP: This was one of the first kits I tried out on my return to modelling. With hindsight, I'd like to add a few things.
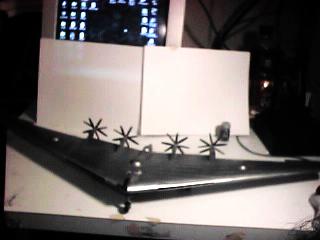
First, metal finishes - The metallizer sealer tends to flatten the metal finish, badly. If you want a good, shiny metal finish, you have a few options. First, *don't* use the Metalizer sealer. Use Future (or Kleer, in some parts of the world) to seal instead, or use SNJ Spray Metal. They're much more durable, and don't dull.
Second, I have to reiterate - be careful with the leading edge radiators. A bit of caution will make all the difference in this model.
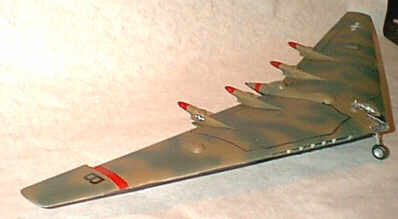
Second update (8/1/2000) - With three moves behind me and this model, it was showing some serious wear. Propellers and nose gear had broken, and things were rough. Also, I didn't like the result of one of my first metal finishes. After some consideration, I turned this into an "operational" XB-35. A very British camoflage of dark earth and dark green over black adds more visual interest (in my opinion) than the "proper" US olive drab over black. Fictitious bomb group markings (the "B" and the red stripes) and basic US insignia complete its transformation. The propellers, as you can see in the photographs, no longer exist. I'm considering removing the landing gear and mounting it "in flight" - if only I had higher ceilings!
This kit is a little harder to find these days, but it's worth the build if you want an interesting subject. Just take your time and test fit everything.